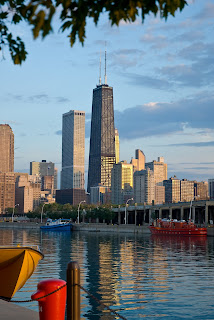
This posting presents the work flow for using images generated using render passes in Maya as layers in Adobe Photoshop. Working with render passes and compositing is an efficient way to create architectural visualizations. It affords a level of control and time savings that is superior to that which can be achieved inside of your 3d modeling and rendering package.
It all begins with a background plate. An careful examination of the background plate sets the tone for the lighting and material properties of the composition in Maya. I was attracted to this image because of its deep sense of space. It has very strong foreground, middle ground and background elements. This image, shot at dusk has very richly saturated colors. Note the blues that predominate the sky and the water and the slight yellow tint on the hardscape elements. These all provide clues for how to approach the lighting and materials in Maya.
Two directional lights were set up in Maya. One was colored blue and places on the left side of the model and the other was painted yellow on the right side of the model to match the lighting in the background plate. Mia_material_x_passes were used to create the surface shaders for the model. Several render layers were created to extract and Isolate the elements of the composition.
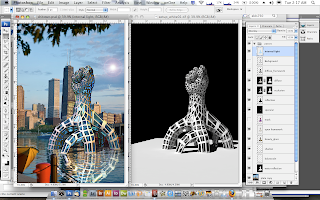 In Photoshop these passes were imported as both image layers and alpha channels into a single document that could be used to generate a variety of images.
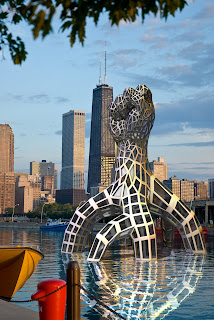 The image above is the base image that is created using render passes and alpha channels generated in Maya. Once set the layer modes and layer information can be manipulated to create a wide variety of images using a single file.
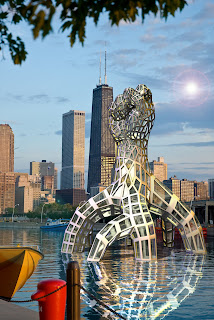 In the image above Internal Illumination was added to the images using hue and saturation on a mask layer of the glass panels of the sculpture.
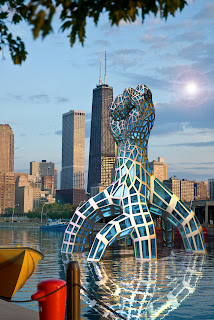 In the image above the internal Illumination the hue is manipulated to give the object a blue tinted illumination by manipulating the saturation on a mask layer of the glass panels on the sculpture.
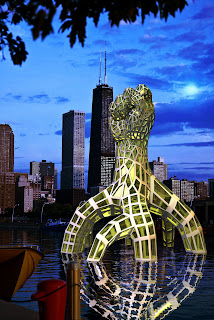 In the image above a night-time version of the image is created by manipulating the hue on both a mask layer and the background plate.

No comments:
Post a Comment