Showing posts with label Andrew Emmet. Show all posts

Monday, May 30, 2011

Andrew Emmet: Final Renders


These are my final renders. The first two are exterior approaches to the building. One from atop the hill and one from down the hill looking up. I was imagining it as a vertical farm with glass terrariums as growing spaces. The interiors are of the only two occupiable spaces, a platform at ground level and at the buildings top level (looking down)

Saturday, May 28, 2011

Andrew Emmet: model for final


These are the render views that I'm using for the final renders. The building is a scaled down version of the coiled midterm skyscraper. It would be a vertical farm, set in the woods. The glass elements are suspended terrariums. I included the hypergraph network for an environment shader that creates the forest surroundings. Instead of using one image, I used a cloud texture that I edited to look like the dappling of a forest canopy and included a transparent material to thefirst color and a specially placed image of a canopy.

Monday, May 23, 2011

Andrew Emmet: photoshop rendering


I wanted to post some examples of just how handy photoshop is. This is a model for studio before and after.

Monday, May 16, 2011

Andrew Emmet: Alex Hogrefe Tutorial


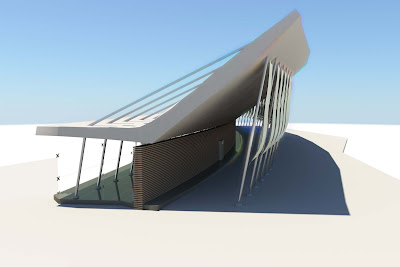
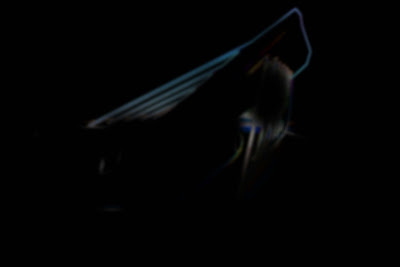
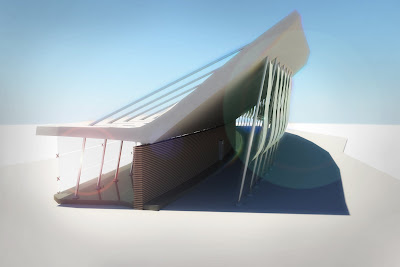
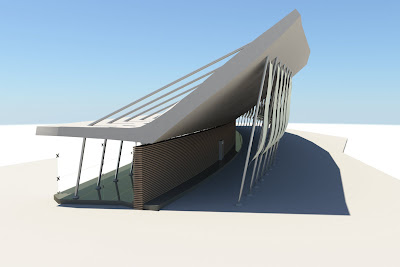
I took this maya render from midterm and applied the photoshop quick tips that Alex Hogrefe gives tutorials for; Vignette edges, Softened Image. I also was looking at the wowfactor tips by Andrew Price and applied some like, lens flares and chromatic aberration. There wasn't a tutorial online for how to add a chromatic aberration in photoshop, only ways to get rid of them, so I made a technique myself.
The second image is the result that I had as a layer over the other final image. The black is just a background added for contrast.
The first image is the base render with only the chromatic aberration added

Chromatic abberation technique:
1.) Apply the stylize-glowing edges filter.
2.) Bump up the edge width and smoothness
3.) Magic wand select the black and dark colors and delete. (select similar to get all darks)
4.) Apply a moderate gaussian blur filter
5.) Increase Vibrancy (not saturation)
6.) With a soft-edged, low-opacity large brush erase out the areas that you dont need.

tip: the effect looks the most realistic when you apply it to one side of the image.

Andrew Emmet: Material Study


I worked on using maya's materials to add the textures in-production rather than post.
They aren't great yet, the sand needs a wavey displacement and the concrete is too hewn-looking. The wood grain looked fine smaller scale but is really pixelated at this size.

I was just becoming familiar with how to make materials to fit the scale of the modelled objects.

I included some of the test render images which probably seem better. I also took this screenshot of the hypershade graph.

Saturday, May 14, 2011

Monday, May 2, 2011

Andrew Emmet: MidTerm Projects (Part 2)


Two Projects:
1. A Beach Resort Restaurant and Gallery
2. An Urban Campus

(One of the renders of the 2nd model is corrupted. Thats too bad it was kinda cool)

Andrew Emmet: MidTerm Projects (Part 1)


Two Projects:

3. A Monolithic High-Rise
4. A Coiled Vertical Farm

Saturday, April 30, 2011

Andrew Emmet: Model Crashes


Hey I was reworking one of the models I had already done.
I added a variance to the size of the modules and wanted to create a skyscraper. The first image is just the tower itself. The second is of studies of the tangled swirling form I wanted.
I merged the modules and tried to wrap them to a box to deform. This is how I did it last time (with a smaller model), but everytime I do it now, it crashes. I cleared the history, tried it on an unmodulated scale piece, and worked with simpler polycubes but it doesnt work. I love this form and have it sketched in my notebook like that, finally glad to see i could match it in maya... and the skin wont take the form! So frustrating!

Friday, April 29, 2011

Andrew Emmet: Image Plane Problem


Hey I was trying to use an image plane to create a sunset background for my image. I also set up a physical sunsky lighting. I hid the mia_physical sky node in the camera attribute editor and assigned an image like in the lynda tutorial. However, the image is showing up all hazy and the lighting is dimmed. how do I get the same directional even lighting and still use an image for the environment?
The top is the desire lighting with just the autosky. The second is the image I want. Third is the dull version I'm getting

Monday, April 25, 2011

Andrew Emmet: Module Practice


Created these renderings to help illustrate the idea of a vertical farm concept. I imagined this form as a series of terrariums integrated like citrus vesicles onto some structure.
I rendered scenes through the seasons, and as if there were a leak in the system spilling into an alley way. Also included are some general test renders.
This way intended as practice for duplicate:special, using ewcArray and module creation in general.

Andrew Emmet: Deformer Practice


I was practicing duplicate:special effects with deformers, twist, ripple, bend, taper etc.
I also played around with dialectic materials and generative context scripts.